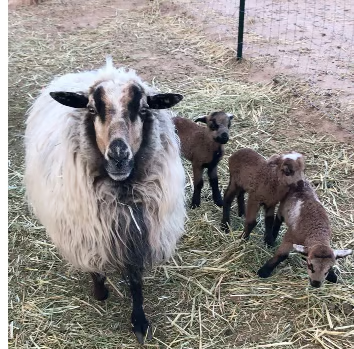
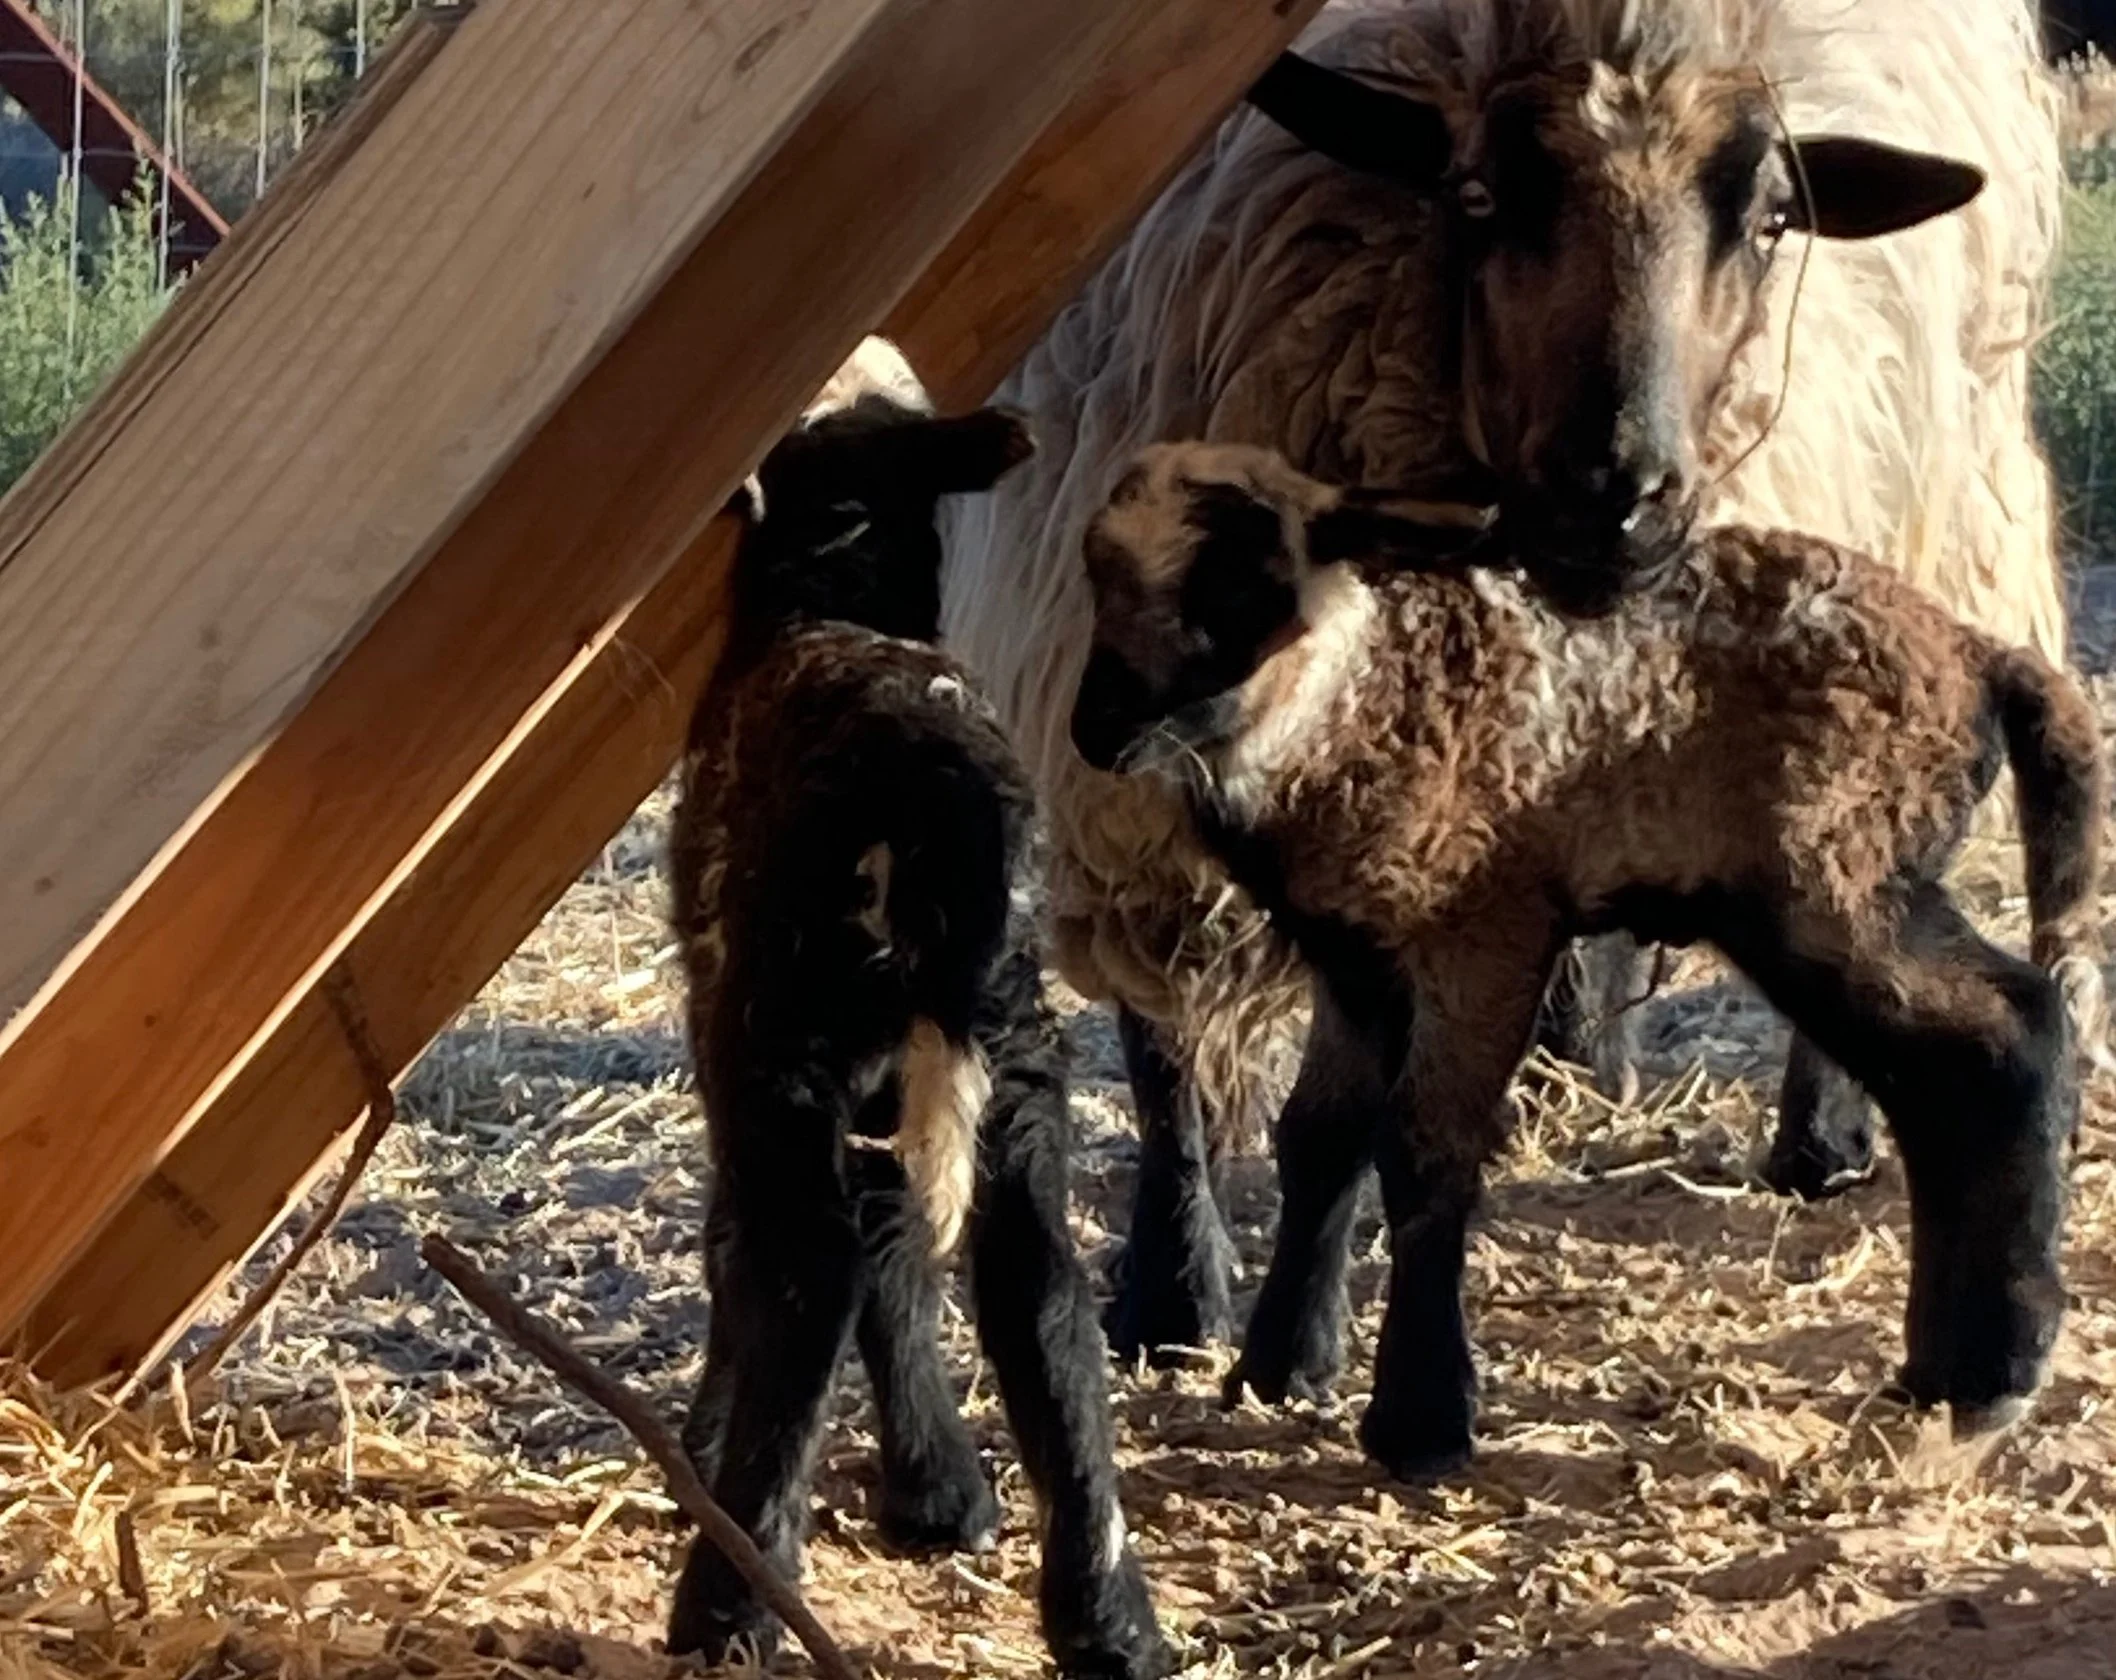
Pippi has been a very busy mother. She has raised two sets of lambs since she has been with us. The first time, she had 2 lambs that we were expecting. The second time, she had 3 ewe lambs that were a complete surprise! On May 27th, 2024, Pippi had two lambs. She was the last of the original three ewes to lamb. She had a boy and a girl, so of course I named them Tommy and Anika. They looked a lot like Pippi, but they did not look like the other Navajo-Churros. Their wool was very tight and crimpy. Now that all of the lambs had been born, it was very clear that they had 3 different fathers. (Multiple rams had been in the pen with them.) Cotton’s ram lambs were all white like her. Brownie’s ewe lamb’s were multi-colored, and Pippi’s 2 lambs had faces that looked like hers, but distinctly different wool from any of the other churros. Left to right- The 2024 lambs- Tommy, 2-Horn, 3-Horn, Little Cow, and Chocolate. Anika is over by Pippi. (Lambs are 1-2 months old in this picture) Now, at this point, we had gone from 3 sheep to 9. (We had also purchased 4 goats, one of which was a real thorn in my side.) To say that we were a little overwhelmed was an understatement. Also, the amount of hay we were feeding tripled. My husband and I decided that we would not be breeding any of the sheep in the fall. We had kept all of the ram lambs in tact, so we set about building another pen to separate them so that we didn’t have any more lambs. We learned quickly that it isn’t just the males that want to mate! One morning I came out to find that the girls had broken into the ram pen. (I could tell by the way the latch was bent.) Oh, well, best laid plans. We watched and waited and in the end, it was Pippi that dropped 3 new lambs on March 4th, 2025. It was not at all difficult to figure out who sired the lambs. (I named them Puppy, Pepper, and Salty.) Hmmm…. Who could the father be? We were able to schedule a shearer out to our hobby farm in early May. He informed me that Tommy and Anika were not Navajo-Churros, they were Barbados Black Belly hair sheep. Their wool was very light in comparison to the churros and it got all over the place because it was considered hair. There really wasn’t any lanolin in it at all. In fact, it should have eventually shed if they were true hair sheep. Since they were half Navajo-Churro, I have no idea if it would have shed or not. Barbados Black Belly sheep are bred for meat. Apparently, they mature much faster than Navajo-Churros and they can breed year round. This would explain why Tommy (the youngest of the rams) was the only one who reproduced. Later, when we decided that we needed to downsize the flock, I decided that Tommy and Anika needed to go. They weren’t true Navajo-Churros or Barbados Black Belly. I couldn’t be sure that they would shed their hair since they were still half Navajo-Churro. We do still have a little piece of Tommy left in the new lambs who would be considered three quarters churro and only one quarter Barbados Black Belly. We are planning to have the shearer come back in September this year. The lambs will be at least 6 months old at that point and we will have them sheared. Their wool definitely feels different from the hair sheep, but I won’t know if I like it until I am able to try it out.
Meet Brownie’s Lambs
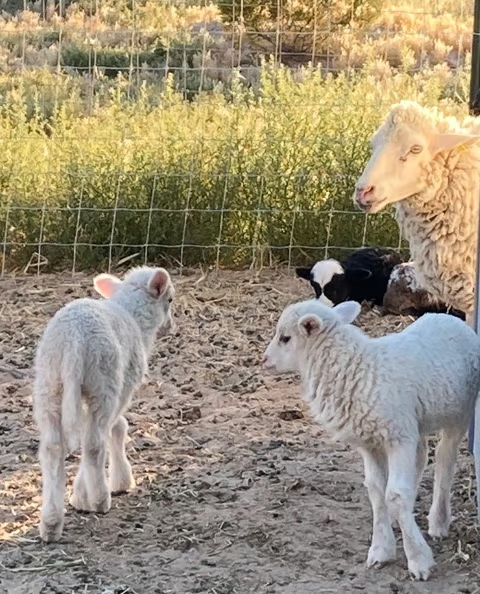
In May of 2024, Brownie had 2 ewe lambs. On May 23rd, 2024, Brownie had two ewe lambs. One was mostly brown and the other was mostly black with some white markings. I thought that the black one looked like a little cow and so her name became “Little Cow.” I ended up calling the brown lamb “Chocolate.” As the months have passed, she looks more and more like her mother. Her brown color faded and there are times when I get the two of them confused. I was also surprised by how much Little Cow faded with time. By the time she was sheared, her outer coat had faded some and her undercoat was a dark gray. Now that she has been sheared, she appears to have changed to gray. The undercoat still looks dark gray but the outer coat looks like a light gray. She still looks different from the others but as time passes the sun seems to be fading their coats so that they are less distinctive from each other. I’m really looking forward to seeing them with their own lambs next spring!
Meet the Rams
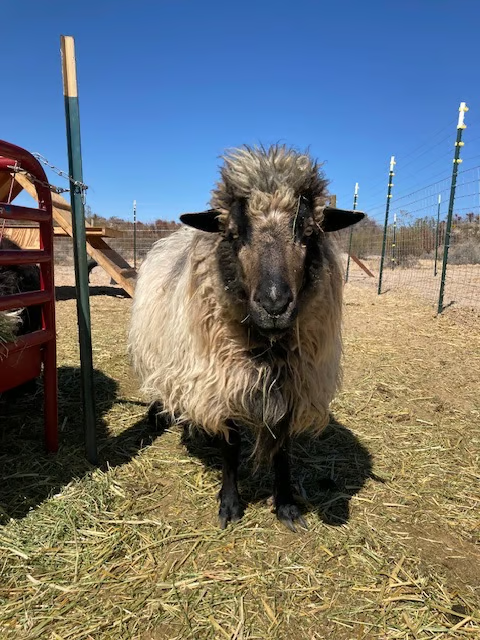
Three ram lambs were born on our farm in 2024, but we only kept one. Cotton was one of our 3 original sheep. She was the first one to lamb on May 6th, 2024. The day before, I suspected that she might be getting ready to have her lambs because she wasn’t eating and was staying off by herself more than usual. When I went outside the next morning to feed everyone, I was surprised and delighted to see the 2 adorable little white lambs. She had already cleaned them up and was stomping her foot at me to stay away! I was a little worried that the lambs wouldn’t be able to get to her milk because she had so much wool but it wasn’t a problem. We kept the other sheep away for the morning so that she could have some privacy and time to bond with her new babies. I also gave her a bowl of grain and alfalfa pellets which she very greedily ate, once I left the pen. We knew that we only wanted to keep one ram but we wanted to be sure that we picked the right one. Everything I had read said that you should castrate them by day two, and you shouldn’t wait more than a week. We did manage to catch them both on day 2 and examine them. We docked the tail of the one we wanted to keep in tact but my husband didn’t really feel comfortable castrating the other lamb on day because it was so small. We waited until day 7 and checked again and he still felt very unsure because they were still so small. It was very different from castrating a goat at 8 weeks. Eventually decided to keep them both in tact. As they grew older, their horns started coming in. The one we were planning on using as our breeding ram had two horns and the other had four horns. (Navajo-Churros can have up to 6 horns.) One of the four horns was kind of chalky, flakey, and brittle. Eventually, it broke off and he was left looking rather lopsided. We started calling them 3 Horn and 2 Horn to distinguish between them. Multiple horns can be a desirable trait in Navajo-Churros, but it definitely wasn’t something that I desired. If I was feeding the rams and 3 Horn lifted his head up quickly, I had a very large pointy horn coming straight at me. It wasn’t like he was trying to attack me, but he didn’t seem to have the spatial awareness that should come with that type of equipment! He also managed to get it caught in the metal hay feeder and dragged it several feet before managing to free himself. Because of this, he had to go when we downsized the flock. There was some talk about using him as a breeder so I am glad that he was left in tact. To me, he looked wonky and lopsided. Two horns are plenty! Which is why his brother 2 Horn is our breeding ram. He has two evenly placed horns that are growing away from his face. He is quite solid and really had a beautiful coat of wool before it was sheared it off. We also decided to let Cotton go when we downsized. She was 5 years old when we got her and she was very skittish. When we would enter the pen to feed everyone, she would hang back and wait until we left before she would come over to eat. She would panic at the slightest thing. Everything would be going along fine, and then Cotton would startle and go running off. This would cause all the other sheep to go running off in a panic as well. With Cotton gone, our ram isn’t related to any of the females that are remaining and honestly things are much calmer without her constant panic.
Meet Brownie
Brownie is our largest sheep. Brownie is the largest of the sheep. It took a little longer for her to eat grain out of my hand, but she eventually came around. She is an excellent mother and her two ewe lambs are also quite large. We are planning on breeding her and her girls this fall. Hopefully her girls will be good mothers as well. Brownie seems to be less tolerant of the goats. She was fine with the baby goats at first. She let them jump on her and mostly just ignored them. Once she had her lambs, however, she did not want the goat kids anywhere near her or her lambs. When Tootsie (our female goat kid) went over to try and check out the new lambs, Brownie was quick to head butt her away. Tootsie is a little too brave for her own good so we separated them at that point. I’m sure if we had left them together things would have quieted down but we didn’t want to upset the new moms so we decided to keep them separate after that. Also, after the females managed to push their way into the ram pen, it was just safer all around to keep a pen in between the rams and the ewes. (I’m fairly sure that Brownie led the break in, given her size.) I’m curious to see what Brownie’s lambs will look like next year now that there is only one all white ram.
Meet Pippi
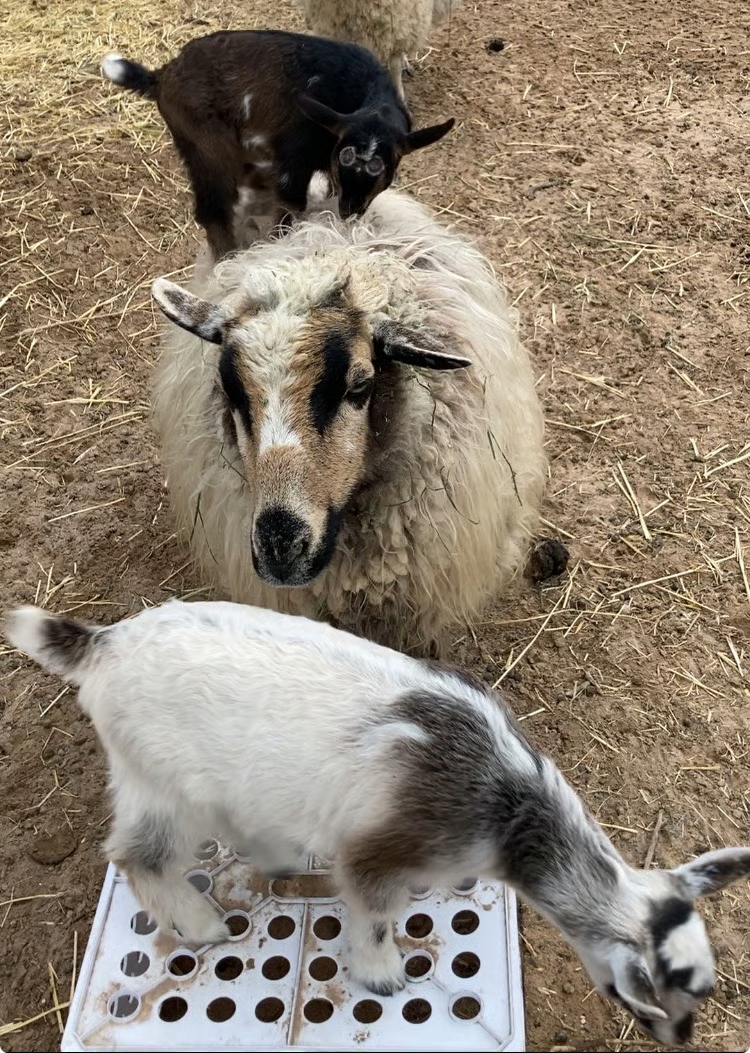
Pippi is my favorite of all the sheep. Pippi is definitely my favorite. She is the bravest of all the sheep. She was the first to eat out of my hand and is always the first to come over when I bring out the hay. She has no problem eating out of the hay tub while I am trying to put it into the feeder. Her lambs are also comfortable doing this. (I get sneezed on daily.) Pippi is an excellent mother and has raised 5 healthy lambs since she has been with us. Her demeanor is calm and she is the least excitable of all the ewes. I would also say that she is a bit of a saint with the little ones, even those that are not her own. Once the ewes had been with us for a while, and I realized that it was highly unlikely that I would ever be able to milk them, I decided to get a Nigerian Dwarf doe in milk. We brought her onto our farm along with her 2 goat kids. None of the sheep had given birth at that point and they were all still very skittish where we were concerned. They tended to stay far away from us whenever we entered the pen. The new goat mama and her 2 kids, changed the dynamic considerably. The sheep all seemed to calm down and relax a bit which was kind of surprising considering how crazy the little goat kids were. They were running around all over the place and climbing on everything, including the sheep! When we got the sheep, they were clearly overdue for a shearing. Since we only had three ewes at the time, no shearer wanted to bother coming out because it wasn’t worth their time to shear only 3 ewes. All this extra wool made it very easy for the goat kids to jump up and hang on while riding the sheep around. Saint Pippi would just stand there and let them climb all over her. Hopefully all that extra wool padded her poor back from goat hooves!
Three Ewes
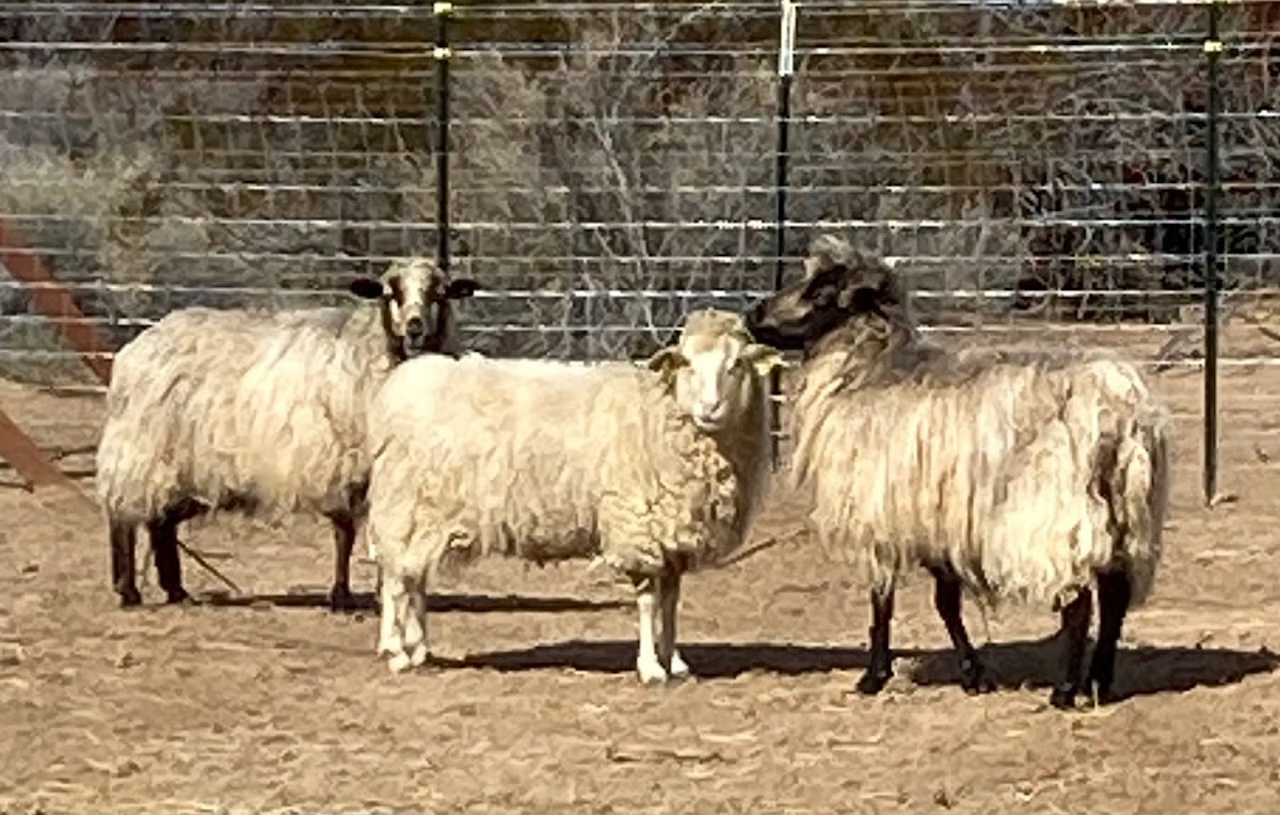
We started our flock in January of 2024 with three pregnant ewes. In December of 2023, we had been living on our small homestead for 3 years. We had finally figured out chickens, and our garden had been increasing in size each year, so we decided to try our hand at livestock. We were shopping local and didn’t have a very large selection available to us. I knew I wanted to get Navajo Churros because they were listed as “critical” on the Livestock Conservancy Priority list. I also liked that they are considered a tri-purpose breed because they can be used for wool, meat, and milk. I was mainly interested in their milk because I had read that sheep milk made delicious cheese. We visited a local farm and decided on these three ewes. We weren’t yet ready to take them home, and we wanted them to be pregnant so we agreed that they would be delivered on January 30th, 2024. In the mean time, they would be moved to a pen with multiple rams. I had read about what I should be looking for, but to be honest, the sheep were so overgrown with wool that it was impossible to tell much. Also, if we made any attempt to go near them, the entire herd just started running. So I picked Pippi because she had such a pretty badger pattern on her face. Then I just had the farmer pick me two more from the few that they were selling. At the time, I suspected that I was probably not going to have much luck milking them, but we bought them anyway. We really had no details about them at all but the white ewe had an ear tag that said that she was born in April of 2019 so she was already almost 5 years old. Her ear tag also said that her name was “Tippy” but that sounded too much like Pippi, so I decided to call her Cotton because she was all white, and I thought it was kind of funny. The largest ewe had a brown face, so I decided to call her Brownie because apparently I am not very original. Once delivered, the three ewes clustered together and tried to stay as far away from us as possible. Eventually they started to calm down when we came into the pen and no longer tried to run to the farthest corners to get away from us. After much sitting in the pen, Pippi finally started to come over to me to eat grain out of my hand. After watching Pippi reap the spoils of her bravery, Brownie started coming over as well. Cotton, however, continued to stay as far away as possible and never did eat out of my hand.
Can You Ply Commercial Yarn Together?
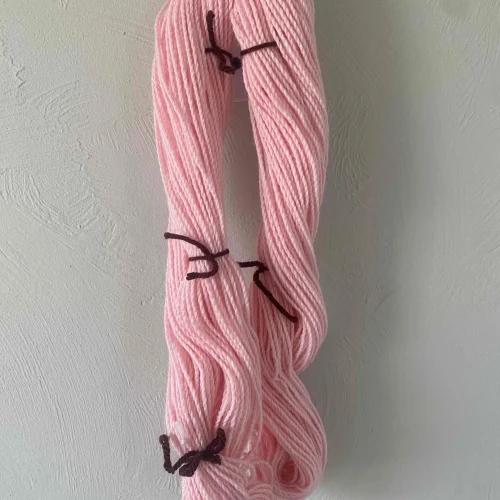
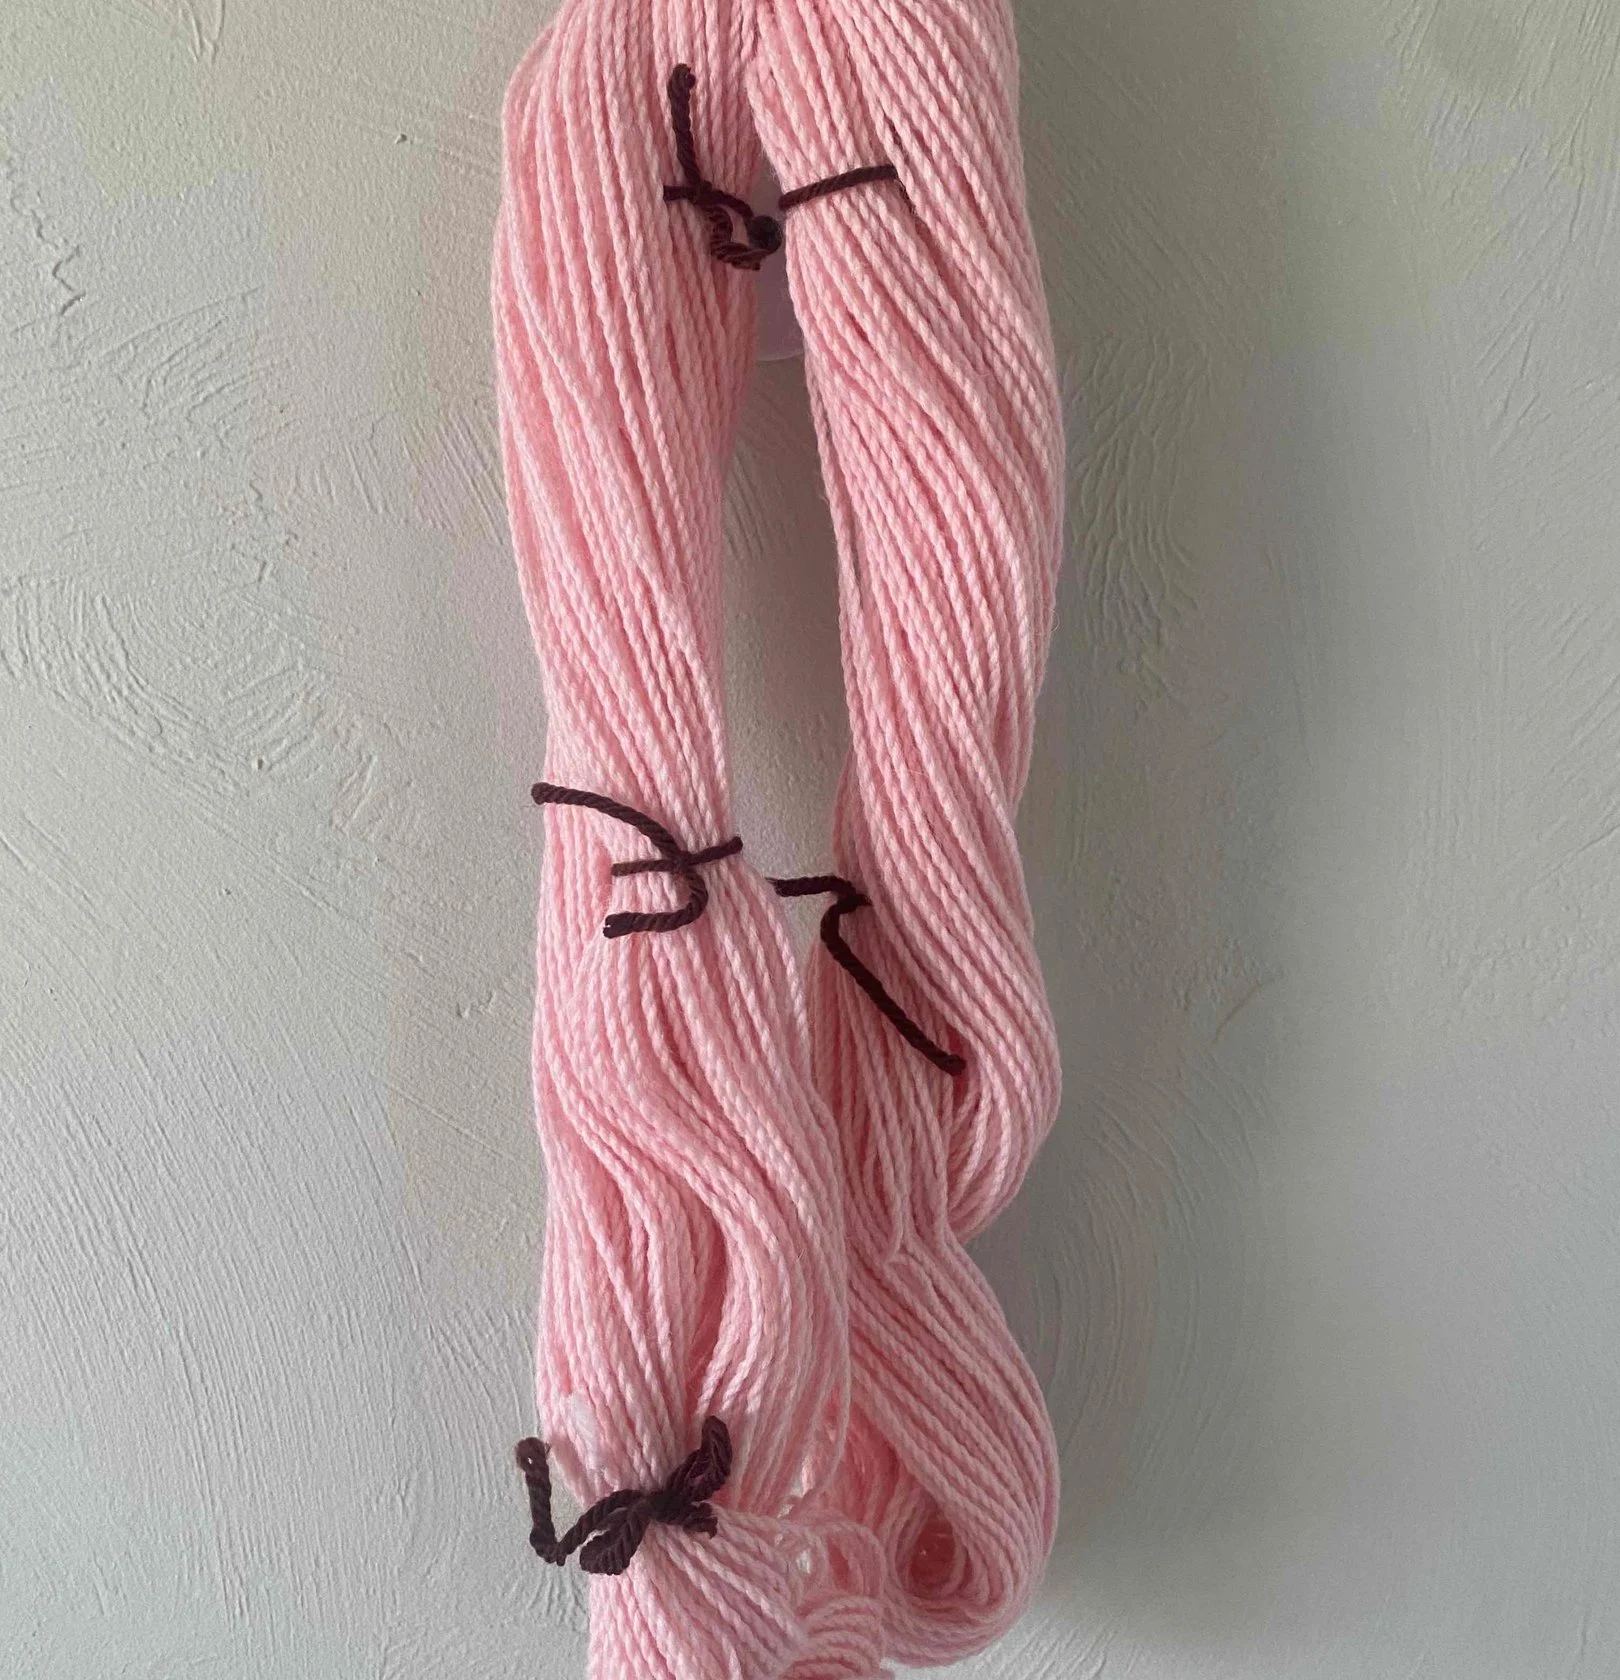
I had a couple of cones of commercial yarn which was thin and difficult for me to work with. I decided to double up the yarn and ply it with a Z twist, in order to get a more crochet friendly yarn. I am still learning how to crochet and I am finding that it can be difficult to work with my hand spun yarn because I am not always the most consistent spinner. Because of this, I like to use commercial yarn to practice. It is easier to use and much easier to come by! I received some relatively “free” wool yarn that I was using to practice making a hat. It was a four-ply fingering or baby weight yarn. I was getting rather frustrated with the yarn because it kept splitting and snagging and there were little pulls all over my project. It also looked terrible to boot! I ended up buying some bulky weight acrylic yarn in black and crocheted a hat quite quickly that I was very happy with. I still, however, had quite a bit of this perfectly fine wool yarn that I just really didn’t like working with. I much prefer a thicker yarn and the splitting was driving me a little crazy. The yarn was “S” plied and I had heard that “Z” plied yarn can be easier to work with. It would make sense then, that I could double up the yarn and consider each yarn as a “ply” and make a 2-ply Z twist yarn. I asked a more experienced member of my spinning group if this was a reasonable assumption and she said that yes, I could definitely do this. I used my yarn winder to make two cakes of yarn. (They were more equal in size than the ones pictured.) The original yarn was S plied so, working from the center pull of one of the yarn cakes, I spun the yarn onto a bobbin using the same “S” or counter clockwise twist. Basically, I over twisted it. My yarn cake filled most of a bobbin. I then did the same with the second yarn cake, winding it onto a second bobbin. It did take a while to over twist the yarn onto the bobbin but it was pretty relaxing and it definitely helped me to develop a rhythm to evenly distribute the twist. I did this process over two days but it probably took me about an hour per bobbin since I didn’t have to worry about drafting at all, just pulling equal amounts of yarn and trying to get equal amounts of twist into my sections before I fed them onto the bobbins. Once I had two bobbins of over twisted “S” yarn, I plied them together going the opposite “Z” direction or clockwise. I wouldn’t call my end result balanced, but it definitely looked more like something that I could work with. Since I had never done this before, I wasn’t sure how much twist to add. I also wanted to make sure that it wasn’t so “splitty” when I went to crochet with it so I may have gone a bit overboard. I continued on filling another bobbin with my final yarn and then put one of my hanks into a warm bath to soak and bloom. I left it in the bath for about a half an hour and then I put it through the “drain and spin” cycle on my washing machine. I thwacked it several times to set the twist and hung it up to dry overnight. I was quite pleased and somewhat surprised with the final result. On the left is the hank that has been washed and thwacked a few times and on the right is the energized hank before washing and setting the twist. Also for comparison, the original yarn was about 10 WPI or wraps per inch, and the new yarn is about 7 WPI. The final test was to try and crochet with my new yarn. My original project was supposed to be a hat in rib stitch single crochet. Basically single crochet going into the back loop only. I clearly didn’t get very far before I gave up. For my new project, I wanted something similar that could be finished quickly. I decided on an ear warmer/ headband. The new yarn was much easier to work with. My picture here looks a little sad but like I said, I am still learning. I made, better yarn, not magic yarn. Here is my final project. It worked up very quickly. I tried it on and I don’t like it at all and I will never wear it. Not even to go feed the animals. But, now I know. And I still have a bunch of yarn left over, both the original yarn as well as my new and improved yarn. Maybe I will make a baby blanket later on. I will say that I learned a lot from trying this. I would definitely do it again if I needed a thicker yarn or if I wanted to make a yarn more crochet friendly.
Fixing a Clunky Wheel on an Ashford Traditional
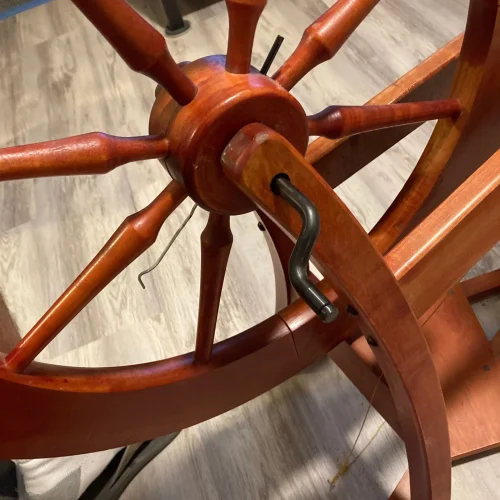
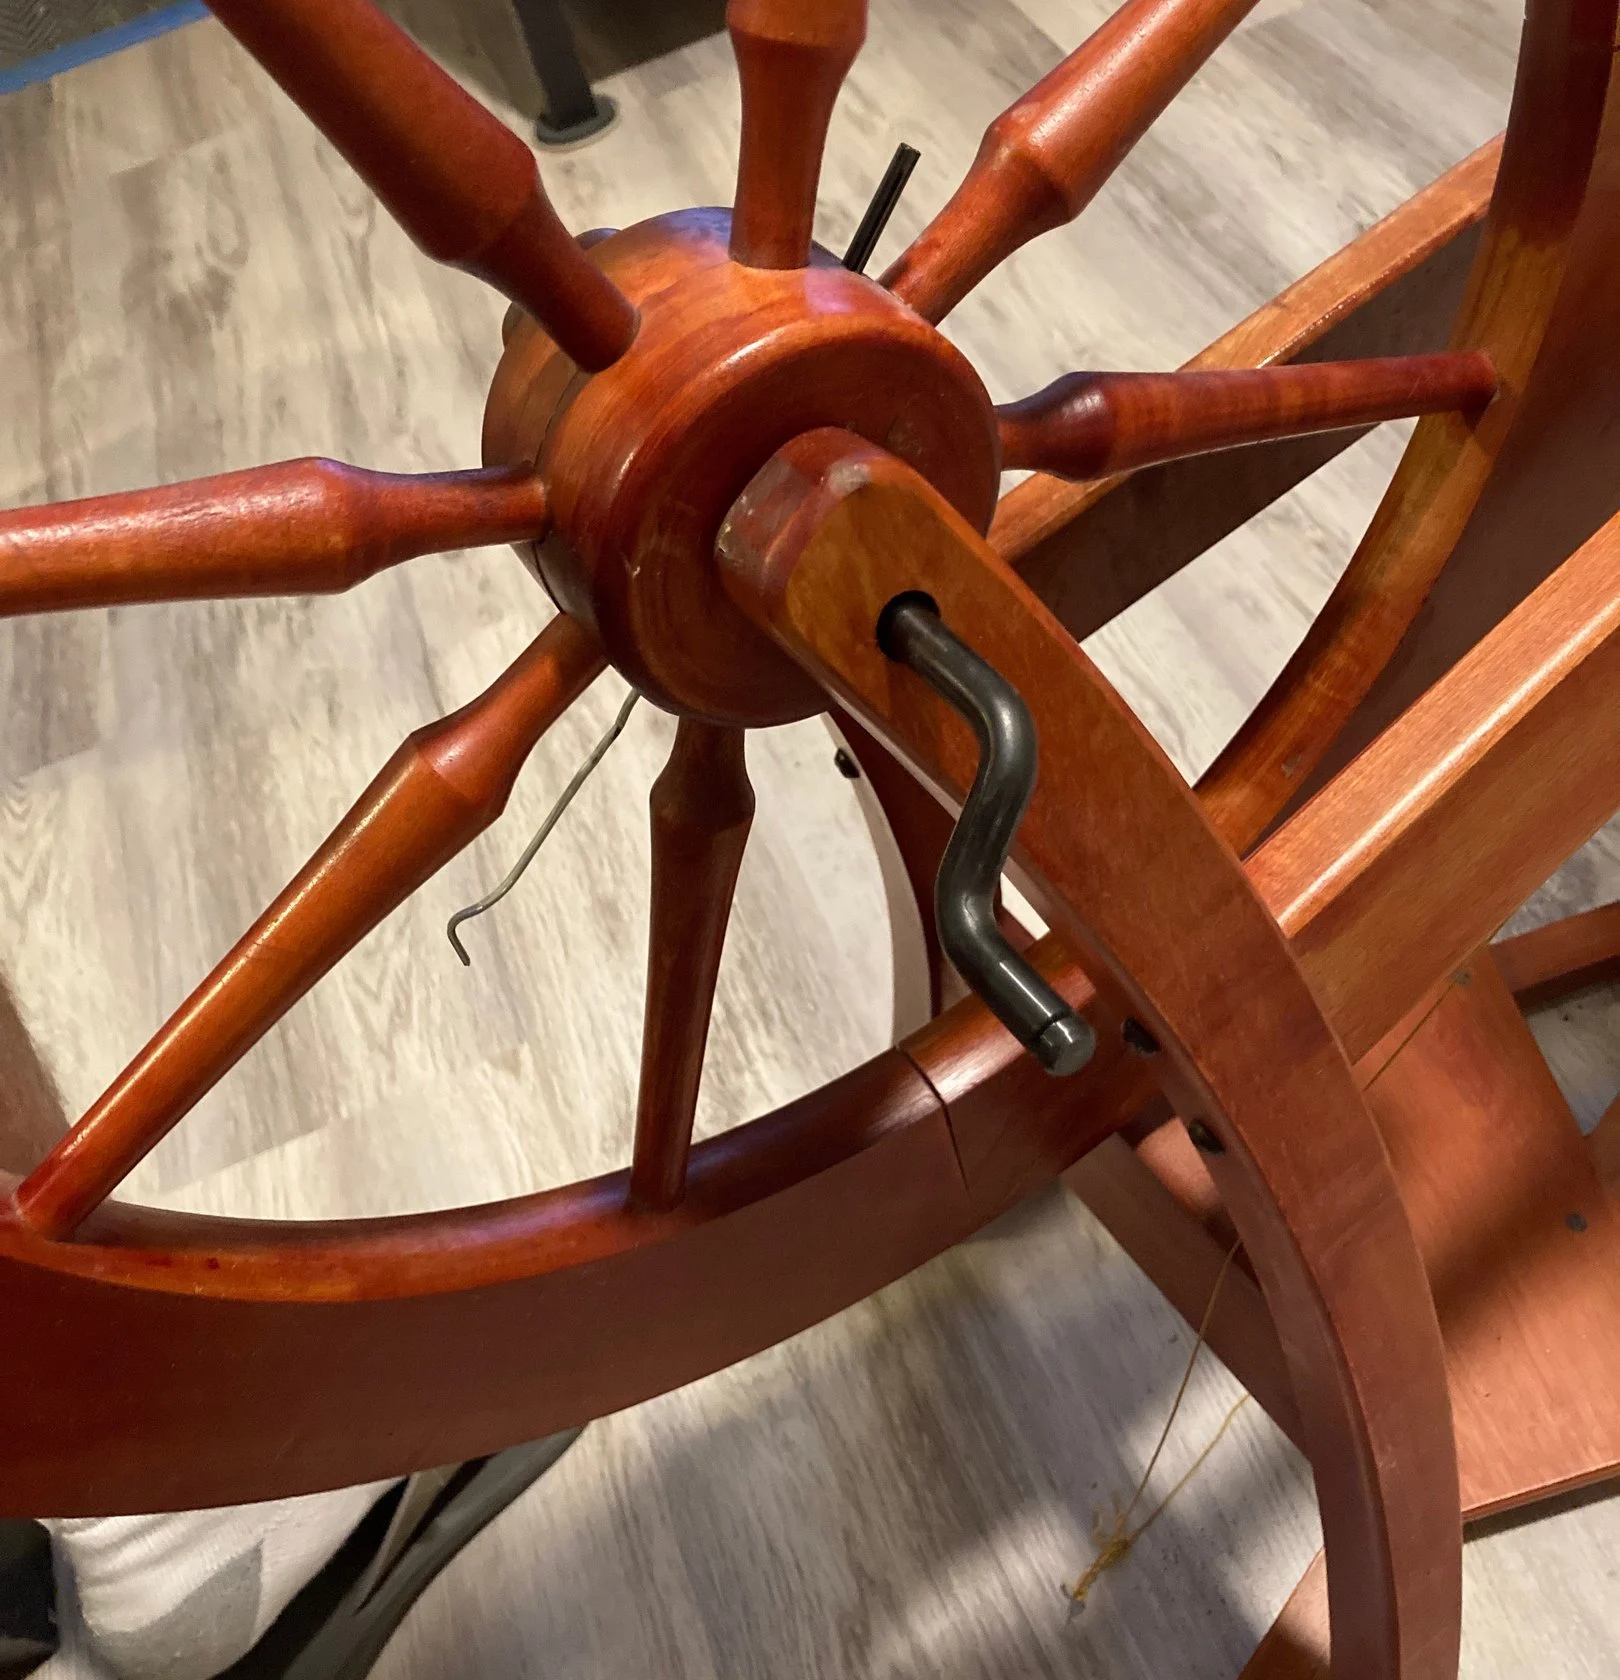
If your Ashford Traditional wheel seems clunky and was made before they changed styles in the 80’s, you may need to change your crank and conrod. If your crank looks like the one pictured here, that is probably the case. This is the oldest style crank and Ashford no longer makes a replacement for it because it was an inferior design. Instead, you need to purchase a “Clunky Wheel Kit,” to fix the problem. The kit includes a crank, con rod, hub pin, leather footman connector, and an O clip. I purchased mine at mielkesfiberarts.com . The kit came quickly and had what I needed to repair the wheel. They also have various pictures on their website to help you determine what type of crank you have. If you are new to spinning and looking for your first wheel, it can be very practical to opt for a used wheel. Hopefully, you can take an experienced spinner with you when you buy your wheel because they will have a better idea of what to look for. If you don’t have anyone to go with you, make sure that you check to see if the wheel is loose on the crank. This can cause problems and can be quite frustrating while you are spinning. This video demonstrates the problem. If the wheel is an Ashford Traditional, the clunky wheel is definitely not a deal breaker because they sell a kit to fix the issue. The cost of the kit is around $50 plus shipping, so keep this in mind when you are negotiating the price of the wheel. In order to upgrade to the new con rod and crank, we first had to remove the old parts. Luckily, the wheel was held in place by a cotter pin instead of a hub pin so it was fairly easy to remove with a pair of pliers. We also had to save and reuse the screws from the old con rod and footman connector. The directions suggested using a nail to guide the crank into place and line up the holes but we just used the old cotter pin. Once it was in place, we turned the wheel to the other side so that the cotter pin kept it in place while we inserted the new hub pin. When we could tell that the hub pin was going through the center hole, we removed the cotter pin. Once the new crank was in, we just had to slip the new con rod over the end of the crank and snap on the O clip to keep it in place. Then we finished it up by changing out the leather footman connector and attaching it to the treadle. This was actually a very easy fix. I am really happy with the outcome. The wheel is much smoother and quieter now. I highly recommend checking out the “Clunky Wheel Kit” if you are having the same problem with your wheel.
Choosing a First Spinning Wheel
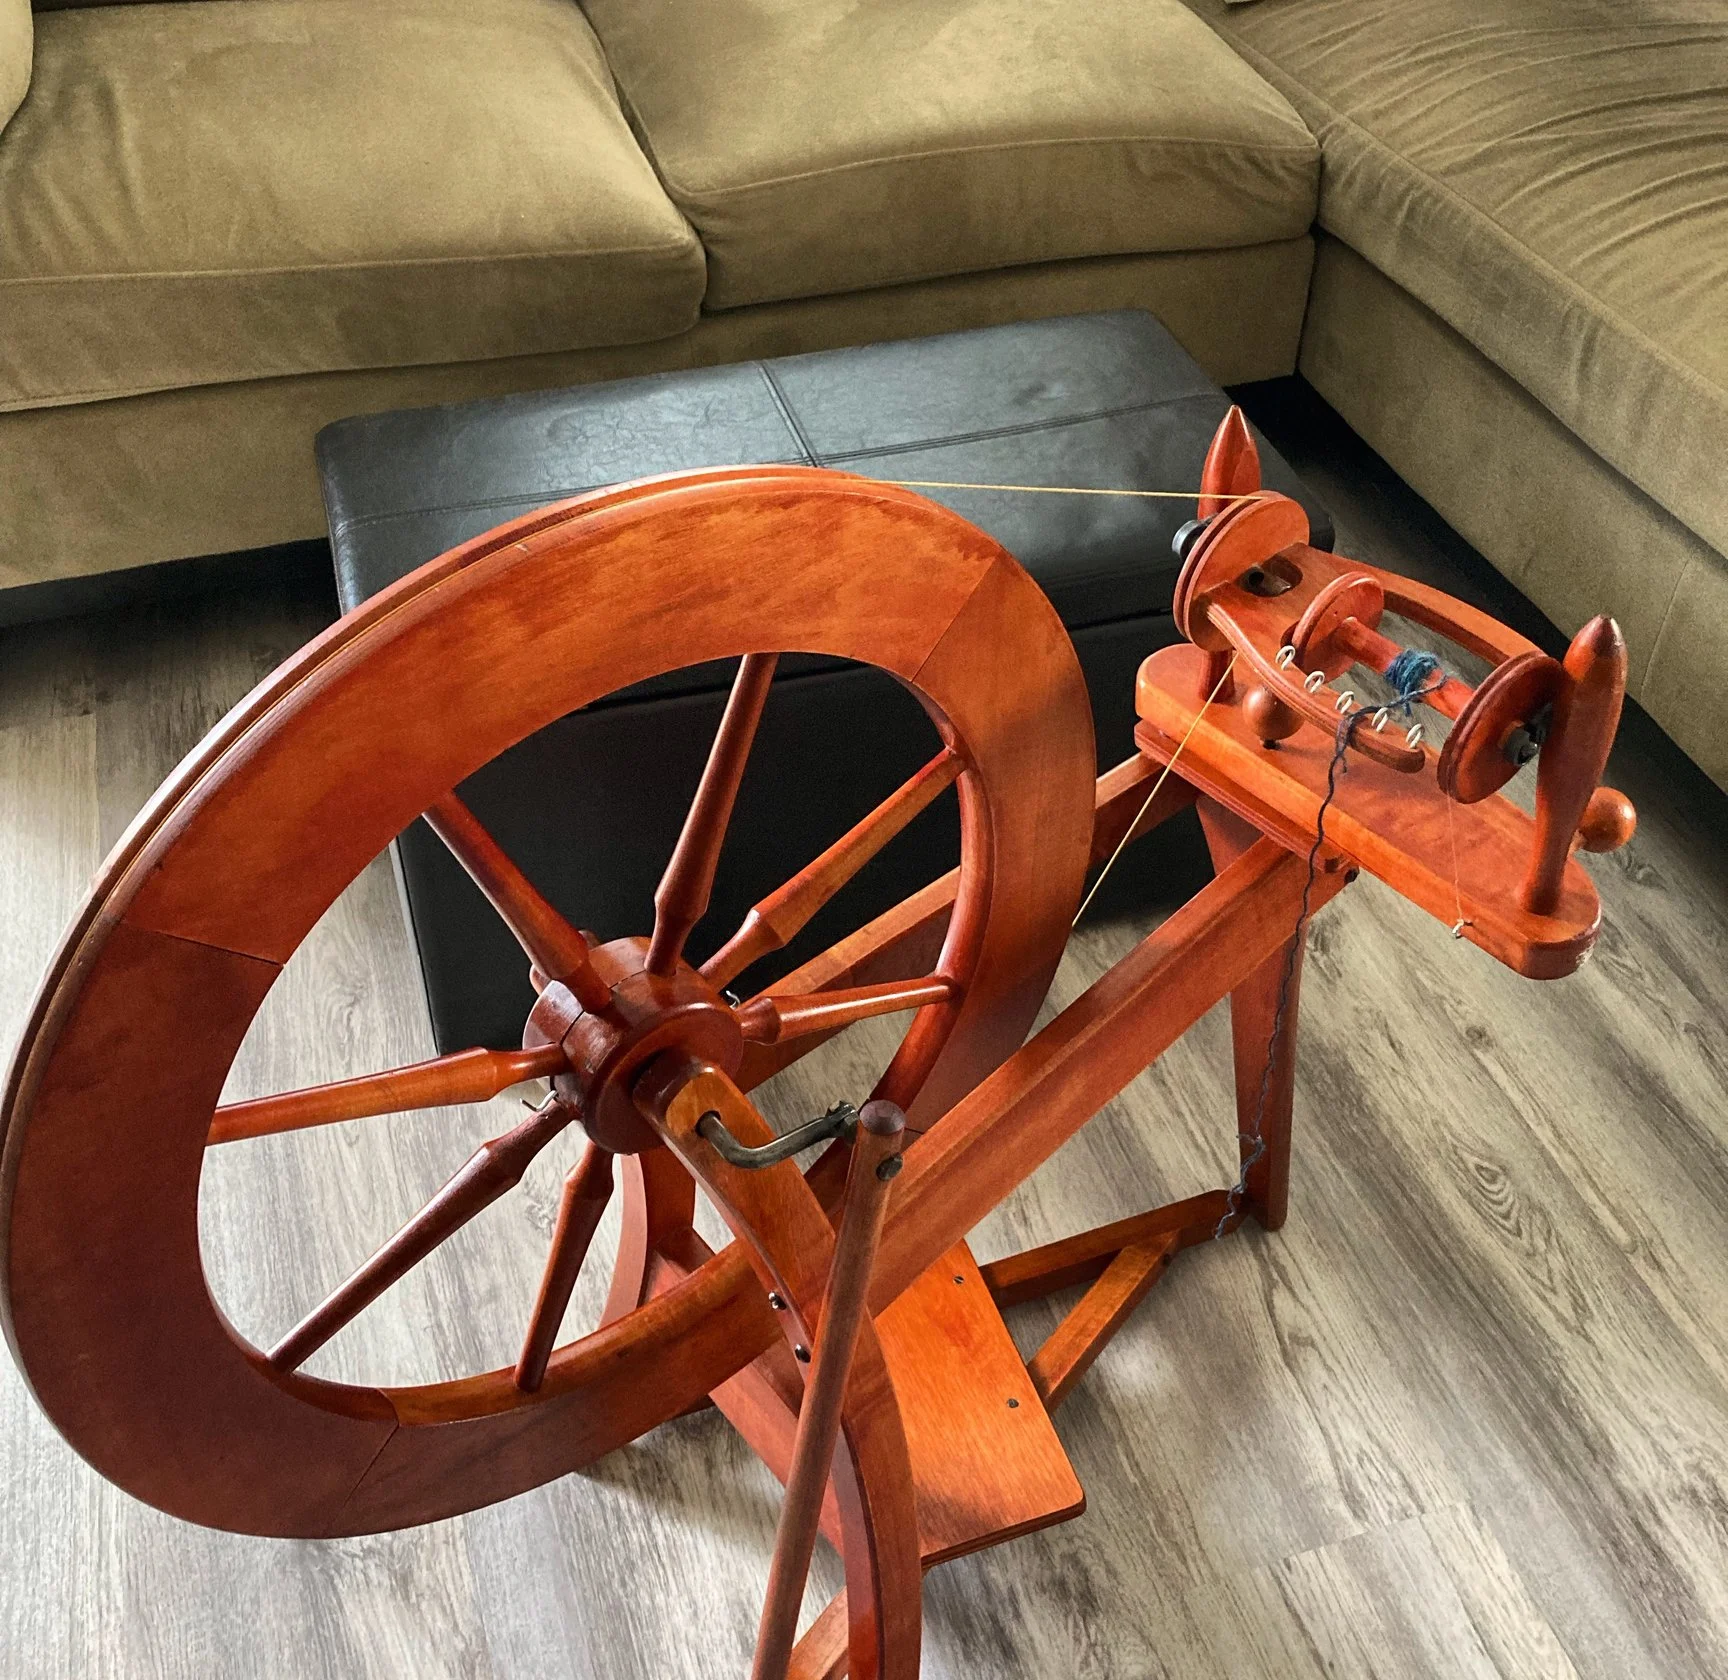
My first spinning wheel was a used Ashford Traditional. If I could go back and do it over, I definitely would have purchased a new wheel and left the used wheel for a more experienced spinner. I purchased my first spinning wheel in December of 2023. We had already bought our sheep, but they had yet to be delivered. I was curious about the wool and wondered how difficult it would be to spin it. I can not emphasize enough that I knew NOTHING about wool, yarn, spinning, knitting, crocheting, etc. So, I decided that I would learn about spinning. I downloaded a bunch of podcasts about spinning and listened to them on a 10 hour drive to visit my family in New Mexico. (Probably not the best way to go about it.) The vocabulary alone was completely overwhelming. Drafting, singles, woolen, worsted, flyer, long draw, scotch tension…. and the list went on and on. After a few hours, some of it started to sink in, but since I wasn’t even a knitter, I really couldn’t make any connections in my mind. Spinning for a project? Not really possible when you don’t know how to knit, crochet, or read a pattern. I did realize that before I learned to spin, I should probably get the knitting basics down. So, while in New Mexico, I picked up a book about knitting scarves that had excellent directions in the back of the book that included pictures. I also decided to watch some videos about spinning so that I could try and wrap my head around some of the vocabulary by at least having a visual aid. It didn’t take long to find Jillian Evie’s YouTube channel. I watched a lot of her beginner videos and had a better understanding of what I had been listening to on the drive up. It made sense to start with a spindle, but since I would be dealing with entire fleeces getting a wheel also seemed to make sense. If you look up the prices of spinning wheels, however, it becomes clear that buying a wheel is pretty big commitment. And how do you decide which one to buy when you don’t even know what you are doing? So I looked on Craigslist to see if I could find a used wheel. I found two. One was in New Mexico and was $750, and the other one was in Kingman, Arizona and it was $250. I was really only interested in the second wheel since $750 was way more than I wanted to invest in hobby that I had never even tried before. There wasn’t a lot of information in the ad but there was a picture. My daughter was able to use the picture to determine that it appeared to be an Ashford Traditional spinning wheel. We then looked up “Ashford Traditional” on YouTube and found that Jillian Evie had a video about restoring an Ashford Traditional wheel. We watched that and I decided to purchase the wheel. I called the woman the next day and made plans to pick it up on my way back home to Nevada since my route goes through Kingman. She was very nice and she said that the wheel was working but that she hardly ever used it. Her mother in law was a spinning teacher so she had purchased the wheel thinking that she would try learning but she never really got the hang of it and the wheel had just been sitting in her house taking up space. Her grandkids would play around with it but no one actually used it and she couldn’t tell me much about it other than it did work. So I purchased the wheel. When I stepped on the treadle, the wheel went around, but not knowing anything about spinning, I had no idea what else to look for. I took it home, cleaned it, and oiled it. I watched the restoring video again. My wheel seemed to work, so I watched the beginning spinning video and practiced my treadling. Finally, I took out some of the generic roving that I had purchased on my trip and tried to spin. Nothing went right. I couldn’t get the fiber to draft. The twist kept going into my fiber supply. The fiber did not uptake onto the bobbin and I ended up with a big tangled mess that looked nothing like yarn. I practiced just using yarn so I could get the feel of it. I was able to get the wheel to take the yarn up and onto the bobbin. Later, when I tried again to use roving, I again ended up with a tangled mess. I just couldn’t seem to manage to draft and treadle at the same time. I also kept getting hung up on the wheel. It felt like there was a point when it got to the top but it just didn’t seem to want to go all the way over and sometimes it would just stop and sometimes I would end up treadling the other direction. It felt like I had to push with my toe and then press with my heel to keep things going smoothly. Add in trying to draft fiber and I pretty much just gave up. The picture shows my best attempt. I felt like there might have been something wrong with my wheel but I just wasn’t sure, since I had no other experience to compare it to. You don’t know what you don’t know! I decided that I needed to find someone to teach me in person because I clearly wasn’t going to learn from a video. I also wanted someone who knew how to spin to try my wheel and let me know if it was working correctly. In the meantime, I had called “The Woolery” and talked to them about my wheel. My wheel had only come with one bobbin and there was no “Lazy Kate.” They helped me

How to Wash Long Wool Locks
This is how I wash Navajo-Churro wool to keep long locks in tact and easy to manage. The system works well for all types of wool. While I am not that great at spinning yet, I have managed to get my wool washing technique down! I have used this method to wash a few different types of fleece, and it has always worked well for me. The majority of the fleece I wash is Navajo-Churro, but I have used this method to wash Merino and Leicester Longwool as well. I have tried several different ways, and this is the one that gets me the best results, particularly for Navajo-Churro because the locks can grow up to 12 inches and even longer if you only shear once a year. Our 2024 lambs were all born in the month of May and were not sheared until May of the following year. Their wool was extremely long! Here is a picture of our rams in a small catch pen waiting for the shearer to arrive! My absolute favorite tools for washing wool are plastic baskets and dish pans. I bought these at Daiso. They are sold in different parts of the store, but they fit together quite nicely and are reasonably priced. At the time of this writing, the dishpan was $6 and the baskets are priced at $2.25. I have quite a few because it just makes life easier but you can definitely get away with two of each. Also, since they stack so neatly, it doesn’t take up that much extra space to store more. Previously I had been using a plastic colander with a fitted bowl, but that was round and didn’t fit all that much. When I started dealing with HUGE fleeces, I needed a better system. These baskets let me wash a very decent amount of wool without needing to use too much water. It’s important to make sure that the water is quite hot in order to melt and remove the lanolin along with all the dirt. Since my hot water heater isn’t set that high, I need to add some extra hot water to my water baths. If I am doing a small amount of wool, I put the dishpans in the bathtub. When I do larger amounts, I move the whole operation outside. To start with, I try to get as much vegetable matter out of the locks before washing them. I pick out large pieces by hand and I use a metal pick comb to flick out some of the smaller pieces. Then I lay the locks out in the basket. I find that it is best not to overfill the baskets. Next, I do a warm or cold water soak. I find that warmer water gets the dirt out faster, so that is usually what I do, but if I am going to leave the locks soaking for a while, (or overnight) I just use cool water. If you are using hot tap water you may want to check the temperature. Lanolin will start to melt at about 120 degrees, so you want your water temperature to be lower than 120 for the initial soak. My tap water comes out at 112 degrees so I fill the dishpan with hot water from the bathtub tap and then place the basket of locks into the dishpan. The locks will probably float up some. They will eventually sink down, but if you don’t feel like waiting, just use the other basket to press them down into the water. While the locks are having their initial soak, I start heating up water for scouring. If I am doing a small amount in the bathtub, I use an electric tea kettle to boil water. (You can also use the stovetop to boil water as well and put your dishpan in the kitchen sink.) My kettle will boil about 1.5 liters at a time. I will usually put some hot tap in the bottom of the second dishpan and then add about 3 kettles of hot water to make sure that the temperature is around 160-175 degrees Fahrenheit. I add 1-2 tablespoons of Unicorn Power Scour to the water depending on how dirty it is. Then I lift the basket of wet locks from the soak water, and I drain off as much water as I can before placing it into the hot scour water to soak for about 25-30 minutes. I don’t want the water temperature to drop below about 135 degrees because I don’t want the lanolin that I am trying to remove to reattach to the fibers. While I am letting the wool soak in the hot scouring water, I start heating the water again for round two. While I am waiting for the kettle to heat, I take the initial soaking water outside to dump it out because it usually has a thick layer of dirt at the bottom of the dishpan that I would rather not dump down my drain. To make it easier to carry, I will pour it into a bucket first. (It’s great for watering plants!) Then I rinse out the dishpan to repeat my scouring process using only about 1/2 to 1 tablespoon of Unicorn Power Scour for the second scour. If your fiber isn’t that dirty, you can omit the second wash but I generally need to do 2 washes. You will also want to make sure that you dump the first scour water outside as well because that is going to have a lot of lanolin in it and you don’t need that clogging up your drain. A couple of times probably won’t hurt, but I wash a lot of wool! Better to be safe than sorry. You will still probably be seeing a lot of dirt and sand at the bottom of your dishpan. Sheep can get really dirty! Because I get tired of hauling water outside to dump it, I generally just wash the