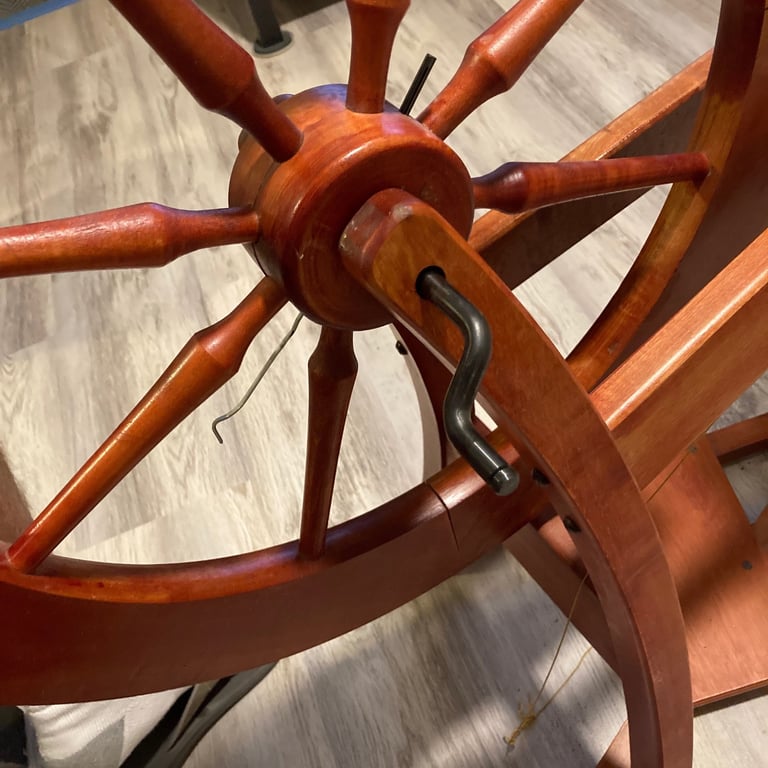
If your Ashford Traditional wheel seems clunky and was made before they changed styles in the 80’s, you may need to change your crank and conrod. If your crank looks like the one pictured here, that is probably the case. This is the oldest style crank and Ashford no longer makes a replacement for it because it was an inferior design. Instead, you need to purchase a “Clunky Wheel Kit,” to fix the problem. The kit includes a crank, con rod, hub pin, leather footman connector, and an O clip. I purchased mine at mielkesfiberarts.com . The kit came quickly and had what I needed to repair the wheel. They also have various pictures on their website to help you determine what type of crank you have.
If you are new to spinning and looking for your first wheel, it can be very practical to opt for a used wheel. Hopefully, you can take an experienced spinner with you when you buy your wheel because they will have a better idea of what to look for. If you don’t have anyone to go with you, make sure that you check to see if the wheel is loose on the crank. This can cause problems and can be quite frustrating while you are spinning. This video demonstrates the problem. If the wheel is an Ashford Traditional, the clunky wheel is definitely not a deal breaker because they sell a kit to fix the issue. The cost of the kit is around $50 plus shipping, so keep this in mind when you are negotiating the price of the wheel.
In order to upgrade to the new con rod and crank, we first had to remove the old parts. Luckily, the wheel was held in place by a cotter pin instead of a hub pin so it was fairly easy to remove with a pair of pliers. We also had to save and reuse the screws from the old con rod and footman connector. The directions suggested using a nail to guide the crank into place and line up the holes but we just used the old cotter pin. Once it was in place, we turned the wheel to the other side so that the cotter pin kept it in place while we inserted the new hub pin. When we could tell that the hub pin was going through the center hole, we removed the cotter pin. Once the new crank was in, we just had to slip the new con rod over the end of the crank and snap on the O clip to keep it in place. Then we finished it up by changing out the leather footman connector and attaching it to the treadle.
This was actually a very easy fix. I am really happy with the outcome. The wheel is much smoother and quieter now. I highly recommend checking out the “Clunky Wheel Kit” if you are having the same problem with your wheel.